Robot training data,built on a single screen.
A physical AI development platform that connects robots, cameras and control devices, and runs the whole loop — record, label, dataset, train, deploy — on one screen. The people on the floor can grow their own AI without being robotics or AI specialists.
Common challenges in physical AI development
1
Months spent just building a data-collection setup
Every project starts from scratch: wiring up robots, cameras and control devices, and recording motion and video in sync.
2
No way to tell whether the data is usable
Data goes into training without checking success, failure or quality, so it is hard to trace why accuracy won't improve.
3
Everything depends on robotics and AI specialists
Recording, training and evaluation are locked inside a few engineers, and the floor can't run them alone.
With the physical AI development platform Physical AI Studio,
data collection to deployment becomes one continuous flow.
* Currently offered as a PoC version. Training and deployment features are being expanded step by step.
Record
Capture motion and video in sync while you operate
Label
Success/failure, quality and tags on the spot
Dataset
Filter by condition and bundle for training
Train
Fine-tune VLA and other models
Deploy
Send the trained policy to the robot
Expected benefits
Set up data collection
Faster
Just connect robots, cameras and control devices as nodes. The recording setup you used to build from scratch for every project is ready right away.
See which data is
Usable
Success/failure, quality, tags and automatic analysis let you decide on the spot which data goes into training.
Less reliance on specialists
Run on site
With on-screen operation and the AI assistant, the people on the floor can take it from recording to improvement themselves.
Features of Physical AI Studio
Point1
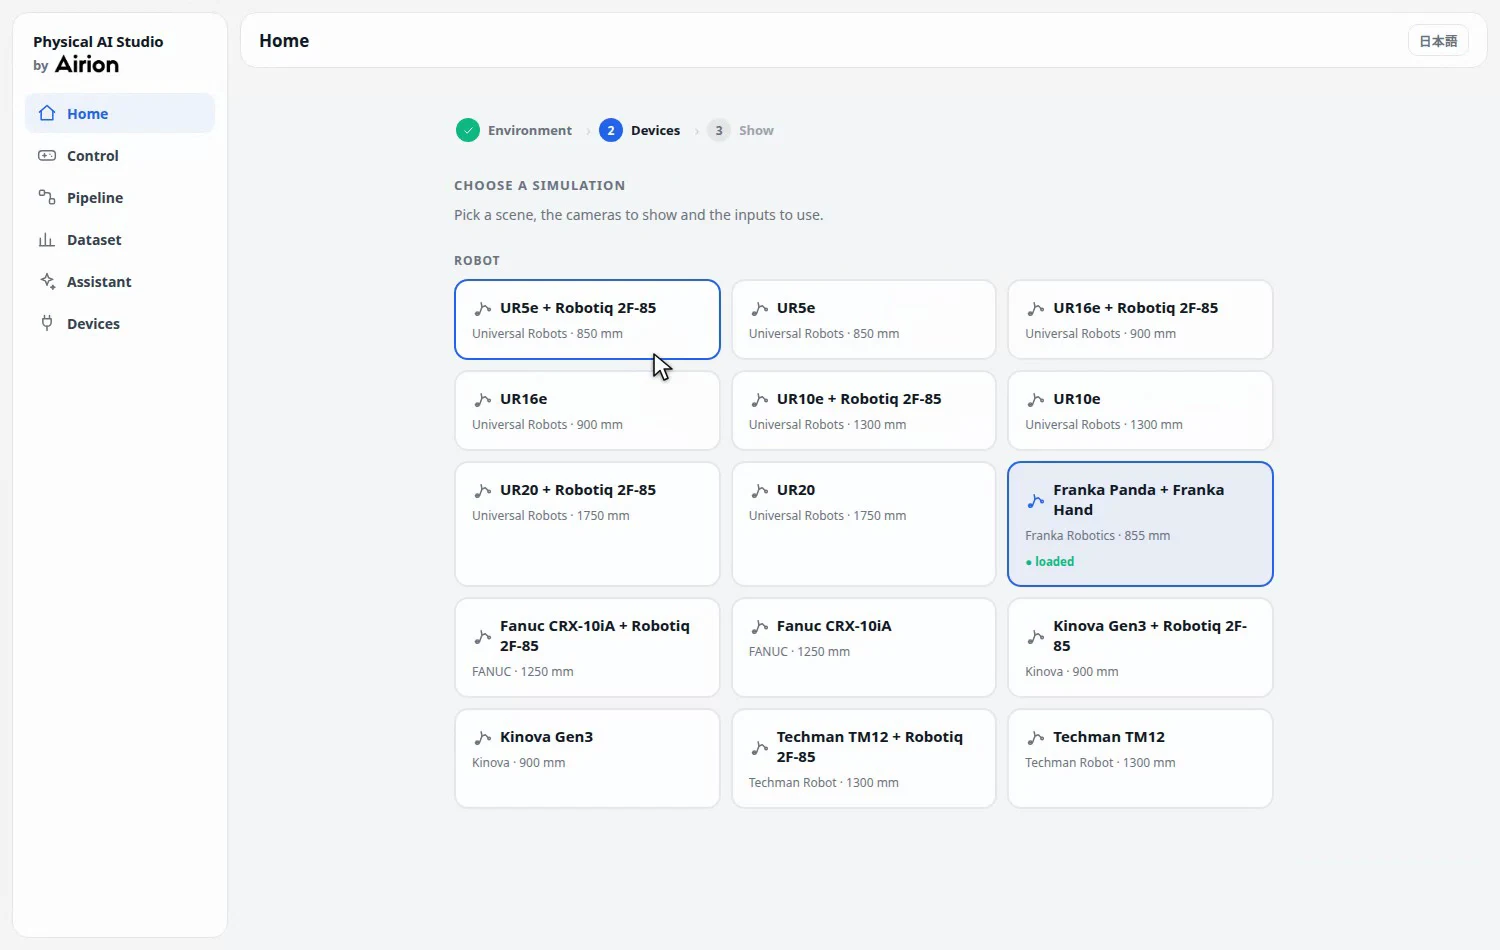
Pick a robot and an environment, and you're ready
Choose simulation or a real robot, then pick an arm and gripper combination from the library. Switch between UR, Franka, FANUC, Kinova and more in seconds. Your own robot joins the list once you add its config file.
Point2
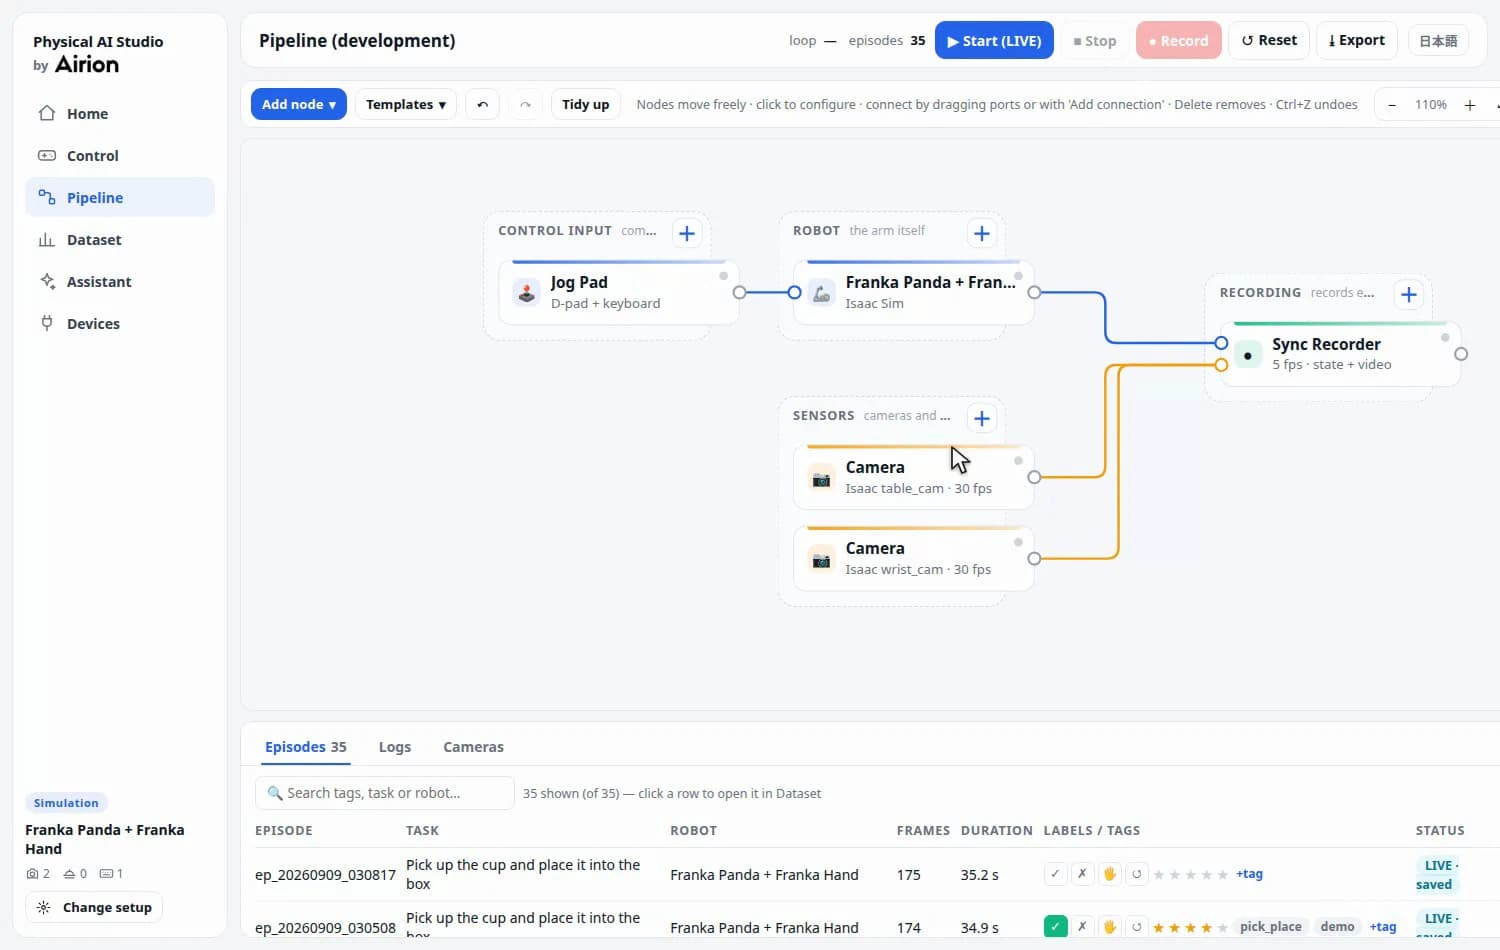
Build the data-collection flow by connecting nodes
Place control inputs, robots, sensors, recorders and training as nodes and connect them with lines. Meaningless connections, like camera to camera, are rejected on the spot, so you reach a correct setup without guesswork.
Point3
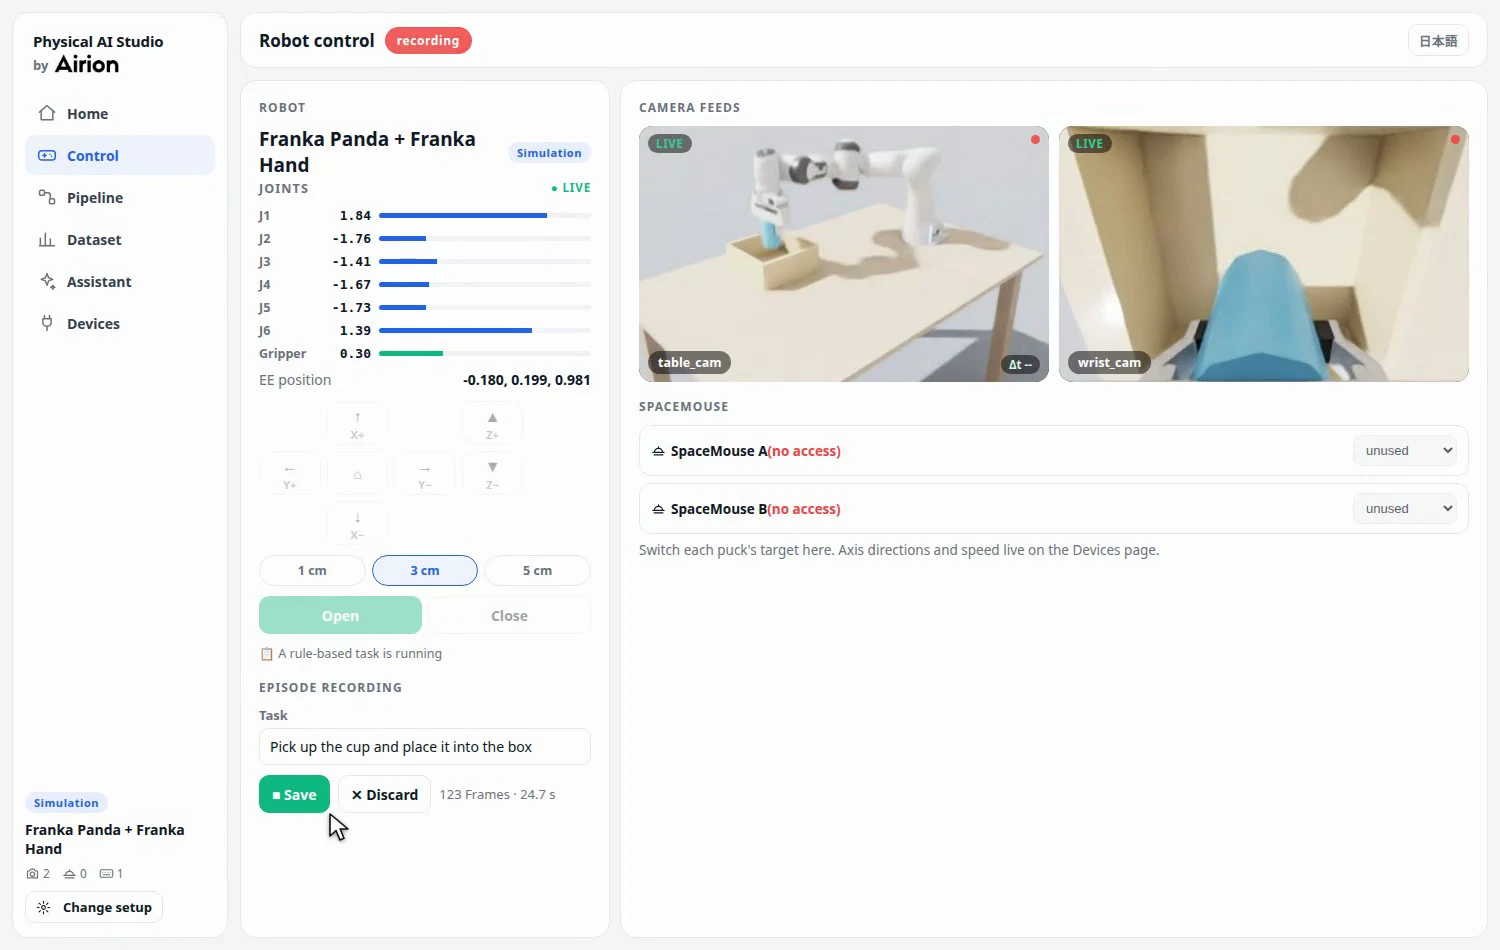
Record motion and video as you operate
Move the end effector with a D-pad, keyboard, SpaceMouse or VR teleoperation, and run fixed motions automatically as rule-based tasks. Joint states and multiple camera feeds are recorded in sync, and the lag between video and state is shown on screen.
Point4
Review and sort your data on the spot
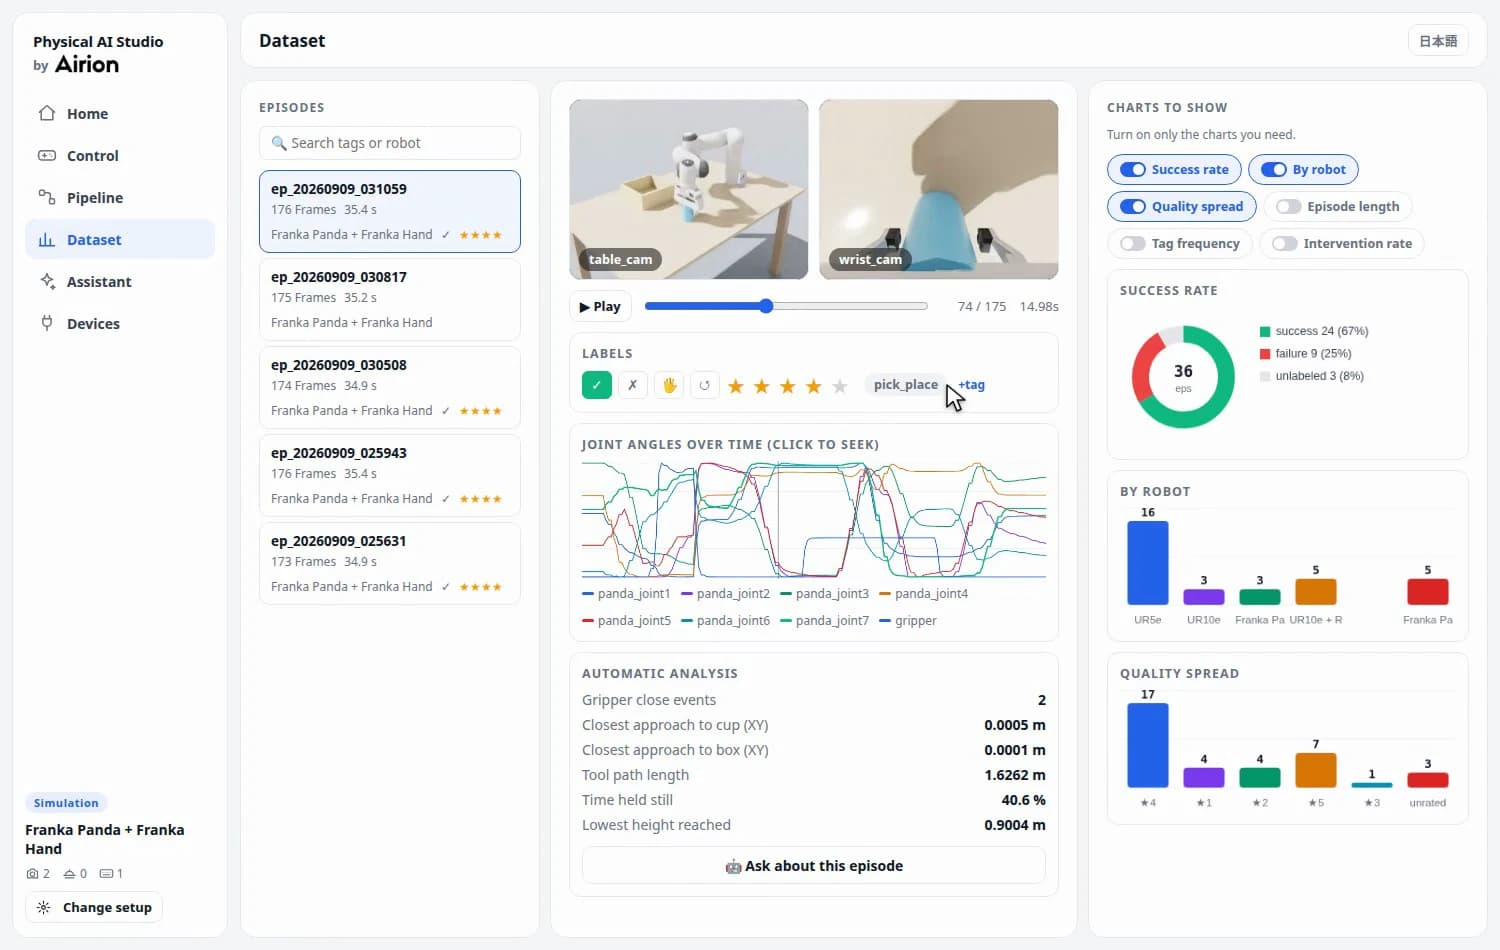
Label success/failure, quality stars and tags while playing back each episode. Automatic analysis — joint angles over time, gripper closings and more — plus success-rate and quality charts help you pick the data worth training on.
Point5
An AI assistant suggests causes and fixes for failures
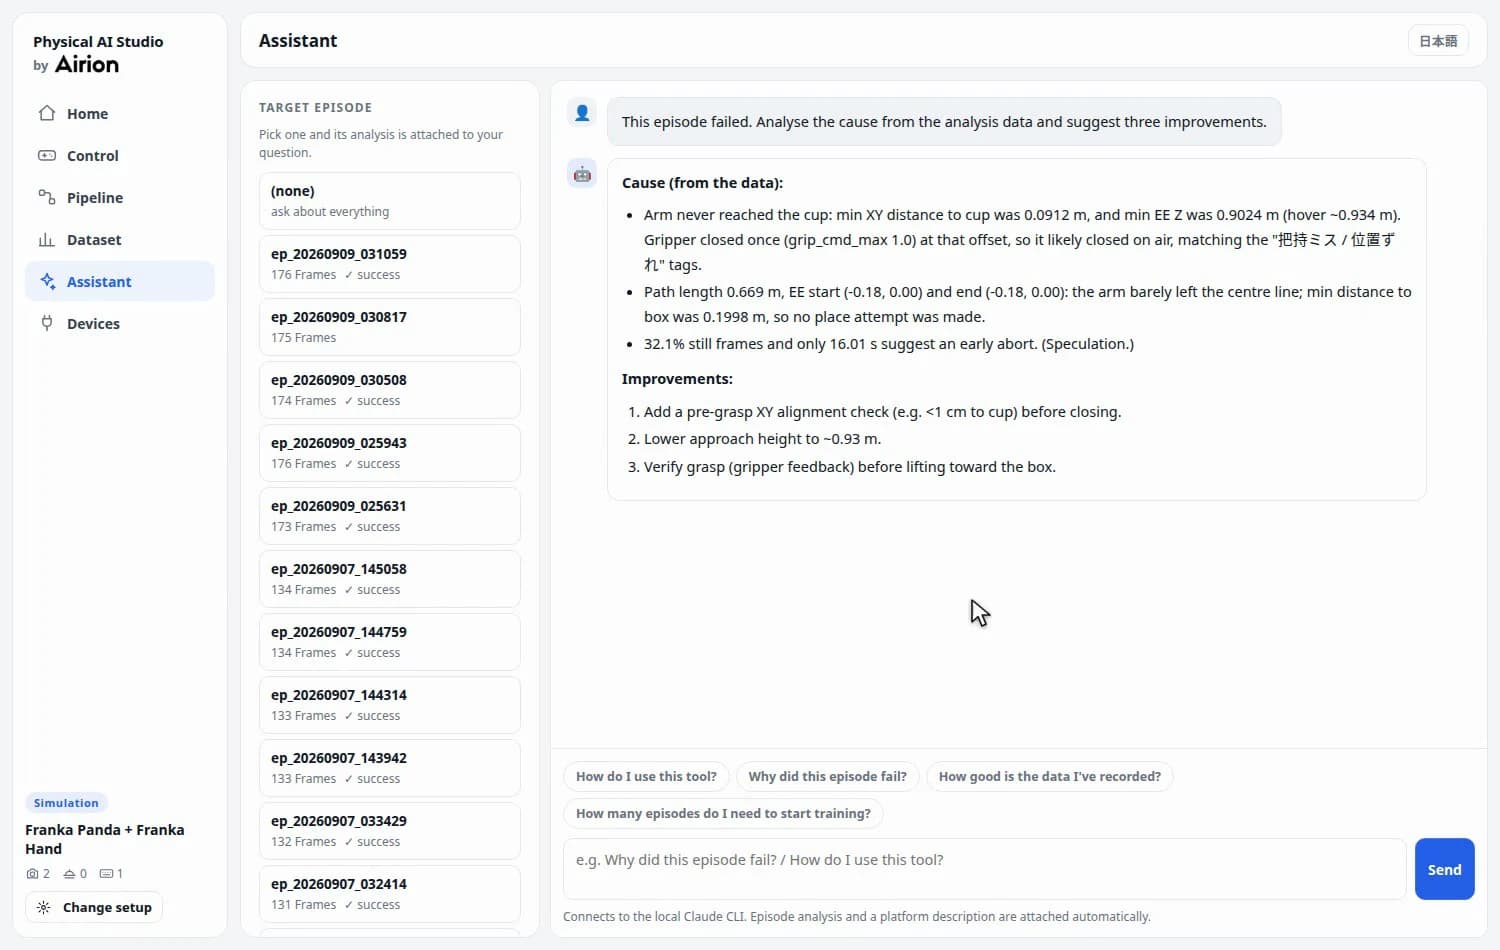
Just pick an episode and ask. The assistant estimates the cause of a failure from the analysis data and suggests concrete improvements. It also answers questions like "How do I use this tool?" or "How many episodes do I need to start training?"
How adoption works
1
Consultation
We learn about the target task, your robots and cameras, and your site environment.
2
Validation in simulation
Before preparing real hardware, we try the flow from recording to dataset in simulation.
3
Real robot & data collection
We connect your real robots and cameras and collect data on site.
4
Train, deploy, improve
We deploy the policy trained on your data and keep improving it based on the results.
Request info / Contact us
Feel free to ask for a demo or questions like "Will this work with our robot?"